Tuesday, November 29, 2011

Tutorial Tuesday: Preserved, Mini Boxwood Wreaths


We have huge boxwood shrubs in front of our house and I have been wanting to try preserving some for months now.  I finally got around to this project!  I told Mr. Rubbish to stop trimming the boxwoods, so they would get tall and bushy.  This made it easy to find nice branches to preserve. 

Preserving is actually quite easy to do.  First, buy glycerin, which you can find at most drugstores.  The day I went to buy mine they were having a buy one, get one free deal, so it worked out perfect!  I still have the other bottle and I am going to trim and start preserving more branches tomorrow. 

Once you have your bottle of glycerin, you are going to make a mixture of 1 part glycerin and 2 parts water.  Heat the water and then stir in the glycerin.  Pour the mixture into a container (I used two large vases) that will hold the boxwood branches while they preserve.  While the mixture is still warm, place the branch ends in the solution 3-4 inches deep.  Place the boxwood branches in the glycerin and water right after you cut them. Some experts say to smash the ends of each branch with a hammer to facilitate the process of the stem sucking up the mixture. I thought this step was too time consuming and my branches preserved just fine without the added step.  

Now, the fun part: waiting 2 to 6 weeks for the branches to be fully preserved.  You will know the boxwood foliage is preserved when it turns a pretty golden color and the leaves still have the shiny, pliable texture.  I think I left mine in the solution for about 4 weeks, but I am not the best at keeping track of time, so it could have been more or less than that. 

Once preserved, the foliage should last indefinitely!


Since the boxwood branches turned golden (see the front branch in photo above), I used spray paint to make them green again.  This is special paint that Nancy got from a floral shop, although I think I have seen this brand at the craft store too.  I also read that you can keep the foliage green by adding green food coloring to the mixture. 


Here is a pile of preserved and painted branches ready to be made into a wreath.


I used heavy gauge wire and electrical tape to make a mini wreath form.  Then I used green, floral wire to attach one branch at a time around the frame until my wreath looked full and pretty. Using 6 fl.oz. of glycerin with 12 fl.oz. of water, I hade enough boxwood branches to make four mini wreaths.


I tied ribbon around the wreaths and hung one on my hutch at Loot.


Notice how the preserved leaves look shiny and healthy!  It really looks like a live boxwood wreath, but has the added benefit of lasting forever.

I like the Moss Green color of spray paint I used because it looks very similar to the natural color of boxwood.  Sometimes the commercially preserved boxwoods that you can buy at the stores, look too unnaturally, bright green.


I got these mini wreaths done just in time for our Christmas decorating at Loot, but I think boxwood wreaths are not just for the holiday season.  They are perfect for hanging in front of mirrors or windows all year long.


I used some dainty, brown and white striped ribbon on this wreath.


I love them hung in pairs too! They really dress up Nancy's beautiful armoire at Loot.


The mini boxwood wreath adds an elegant touch to any home decor. 


This post is linked to the parties on my sidebar.

Monday, November 28, 2011

Burlap and Graphite Chair


 Last month, I won this little, ladder-back chair at an auction for two dollars.  After fixing up sets of chairs, it is refreshing to paint a single chair.  I always feel exhausted by the time I paint, wax and upholster a whole set of dining chairs!


 This was an easy project.  I started by removing the torn seat cusion and then painted directly over the rough, orange-brown stain with Graphite Chalk Paint. The Chalk Paint did a wonderful job of masking the uneven finish beneath it, not requiring any pre-sanding on my part.


After the Graphite paint dried, I sanded it all over, so that it was completely smooth and nicely worn along the edges.  Then, I waxed the chair with a mixture of  Fiddes & Sons clear and rugger brown waxes.


I chose burlap to reupholster the seat cushion because I wanted to keep the chair simple and nothing says simple like burlap.  I used my favorite stencil from Maison de Stencils, which is the same one I used on my slipcovered parson chairs


This post is linked to the parties on my sidebar.

Wednesday, November 16, 2011

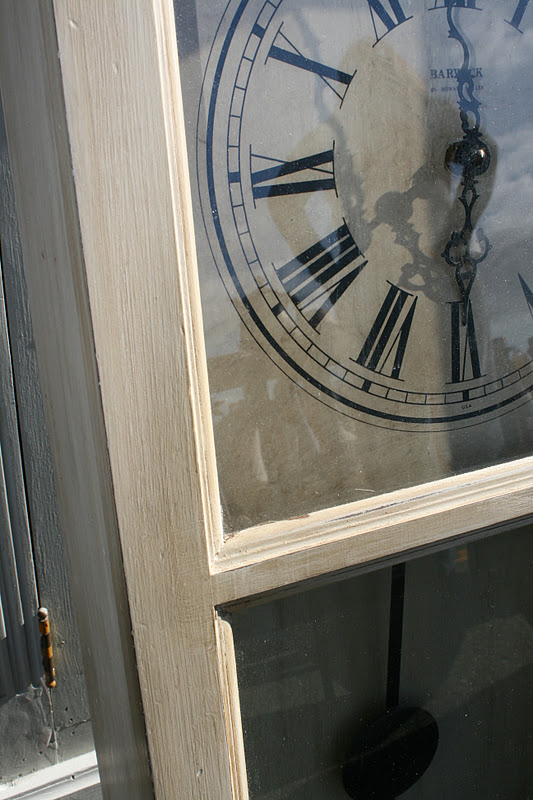
Vintage Clock Makeover


I fixed up another vintage clock for my brother a while ago and it was such an easy transformation.  I come across old clocks frequently at yard sales, but I usually do not buy them.  One day I was talking to my brother on the phone and he mentioned that all his friends love his clock and want one like it, so I started thinking I should find more clocks to fix up.  I recently came across this vintage one at a yard sale for only $3.  It works great and just needed a little cosmetic help.

I started by scraping all the gold and black paint off the glass using a razor blade and water.


I painted the wood with Country Gray Chalk Paint.  Then, I rubbed it with clear and dark wax. 

I rubbed some of the dark wax on the clock face as well and then painted the gold pendulum with oil rubbed bronze spray paint.


I sold this clock right away at the Alameda Point Antiques Faire.  I think I will be on the lookout for another inexpensive, vintage clock to restore.


This post is linked to the parties on my sidebar.

Tuesday, November 15, 2011

Aqua Chair and Mirror


At an estate sale, recently, I came across this lone chair with a rose carved top.


The soiled seat cushion was duck taped to the chair.  I suppose that is one way to attach a seat cushion.

Before

After
I did not have very much Duck Egg Blue Chalk Paint left, so I mixed what I had with Paris Gray and Pure White Chalk Paint to make it go further.  What I got was a very pretty, pale aqua color.


I cut new, thicker foam for the seat cusion and reupholstered it with burlap.


After painting the chair, I sanded the entire surface to make it completely smooth and then I applied clear wax for a creamy finish.


As a finishing touch I applied Antique Gold Rub 'N Buff to all the edges of the chair and the carved floral design.  I have always really liked the look of gold paired with aqua.


 I also picked up this vintage mirror at the same estate sale.  Since I had a little of the paint mixture left, I decided to paint the old mirror the same.


The mirror had beautiful detailing, but it had a lot of chips and cracks.  I just filled them with wood filler before painting.


After painting, I sanded, distressed and waxed.  Then, I applied Gold Rub 'N Buff on the ornate, raised designs and edges of the mirror.


This post is linked to the parties on my sidebar.

LinkWithin

Related Posts with Thumbnails