Wednesday, June 29, 2011

Paris Gray Chalk Paint and Stenciled Table


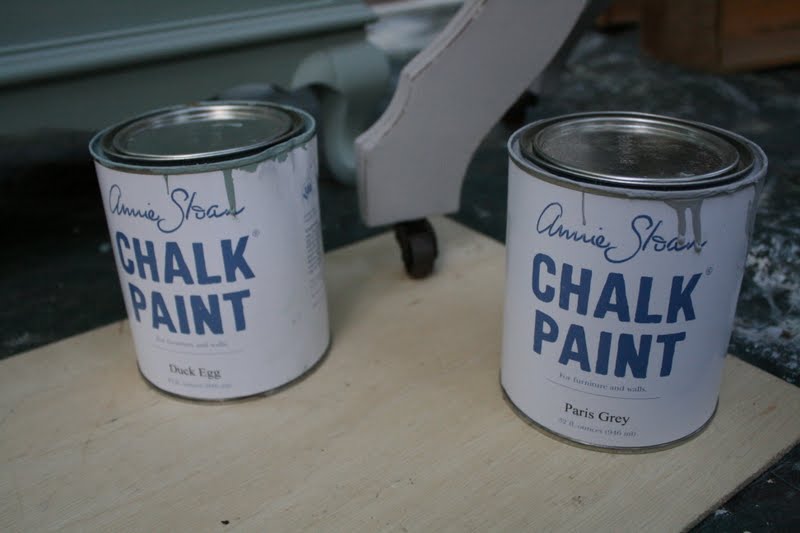
I am excited to show all of you my first, completed Chalk Paint project!  I used Paris Gray with clear and dark wax for this little, Parisian table.


I found this vintage table at a yard sale a couple of weeks ago with Mr. Rubbish.  I offered the guy $2 and he said no, but he would sell it for me for $5.  I decided to take it and Mr. Rubbish was not happy about it.  He said it is beyond hope and that I wasted $5.  I felt kind of bad about buying it, but I was determined to prove him wrong.


I loved the way the legs are shaped and my favorite part about it is the vintage caster wheels.  I admit, it was in need of major help, though.  You could see the screw holes and the line joining two pieces of wood in the top and the legs all had ill-repaired cracks that were quite visible. I just filled all the screw holes and cracks with wood filler.  You do not actually have to primer when using Chalk Paint, but I primered the top of the table anyway because it was in such bad shape and I figured an extra coat would help mask the problems.

Aren't the caster wheels cute?!!
I applied two coats of Chalk Paint in Paris Gray and then stenciled the top.  After stenciling, I realized that it was not perfectly centered and, being the perfectionist that I am, I had to sand it down and do another coat of Paris Gray before stenciling the design over again.  This time I made sure to measure and locate dead center before I started.  Sometimes I am so excited to get started on a project that I overlook, important preparatory steps like this.

After the stencil dried, I sanded it to distress and then applied clear wax and rugger brown wax (both Fiddes & Sons) over the tabletop and legs. Miss Mustard Seed has a great tutorial here on how to apply the waxes and where to purchase the Fiddes & Sons waxes for only $14 per can.

This was my first time using the dark wax (I usually use glaze) and it was a little tricky.  I just used a tiny bit of dark wax on my brush and applied it in sections, blending it over the clear wax.

I bought two, large, vintage stencil brushes, with natural bristles, on ebay for $9 each, to use for the wax and they worked great!  I did not want to spend $35 for a wax brush from the Chalk Paint stockists, especially when I would need two of them (one for the clear and one for the dark wax).  I will show you a picture of the wax brushes I found in my next post.


I really love the two finials in the center of the table base.  The are actually made of iron.  Conveniently, the Chalk Paint is designed to stick to metal as well as wood, so it had no problem adhering.


I found a wonderful independent thrift shop by my house with excellent prices. I got a whole bag of vintage, hardback books for $5, the other day!  I took them home, removed the covers and made book bundles for the shop.


 I have been coming across old, skeleton keys at yard sales and I've been snatching them up for $1 each.


I think the strange, little table, with all the cosmetic problems, turned out pretty cute in the end!


This post is linked:


Monday, June 20, 2011

Chalk Paint Is Here!


After reading so many wonderful things about Annie Sloan's new Chalk Paint, I had to give it try. I was so excited when I  opened my package today and could not resist painting two pieces of furniture on the spot!  I was not sure that Chalk Paint would be all it was hyped up to be, but it really is wonderful!  I loved that I did not have to sand or primer the furniture first. What a time saver!  I bought the chalk paint brushes too and they worked great, leaving a very smooth finish with only one coat of paint.  Did I mention that I really liked skipping the sanding and priming.  I just jumped right in and started painting! The transformation was so fast, it was like an instant reward.  I ordered my Chalk Paint from Classic Wall Finishes and I was impressed with their customer service and how inexpensive their shipping was for a large order (7 cans of paint only cost $17 in shipping).

Here is a sneak peek of a night stand (duck egg blue) and side table (Paris gray) I painted today.  The duck egg blue and Paris gray are both very pretty, matte colors.  I also ordered old white and country gray.  I still need to apply the wax over the paint and I will post full before and after pictures, once I am done.


I am going to be using this paint on several big projects coming up too.  My neighbor is moving into a brand new, beautiful home and she hired me to give her furniture a makeover before they move in.  She ordered primer red, versailles, and graphite chalk paint.  I am looking forward to trying out the bolder colors and, of course, I will keep you all updated as I go!

Thursday, June 16, 2011

French Country Baskets


I love baskets; wooden baskets, wire baskets, all kinds of baskets!  


I found this dark, wooden basket at a garage sale for $5.  It is a nice, large basket and I think the little, metal grommets add so much character to its unique style.  I thought it would look fabulous in an aged, French country style.  I started by whitewashing the basket with white paint thinned with water, wiping off the excess with a rag.  This is what it looked like after the whitewash treatment.


Next, I gave it a coat of Ralph Lauren's glaze in smoke color, which gave the basket a weathered gray patina.  I suppose I should call this technique graywashing.


This wire basket also came from a yard sale and only cost $1.  This photo is not very good at showing the color of the basket before.  It was actually dark black with kind of orange-colored wood handles.


I wanted to create another French country style basket with muted colors, so I applied the same treatment as I did to the other basket.  It really toned down the basket and gave it an antiqued look.


I love the way the handles look after being "graywashed".


Ahhh...Don't you love hydrangeas?  Each flower is like a hundred tiny flowers all held together in one large, magnificent bloom.


This post is linked to:


Monday, June 6, 2011

French Gray Wall Sconce


Our deck overlooks a creek and I want to make it a beautiful place to sit and relax, while listening to the water.  My aunt Susan gave me this lovely, cement urn last time I visited her cottage.  Not much will grow on my deck because it is so shaded by trees, but at least ivy thrives here!  I want to find a couple of french bistro chairs at a yard sale too.  I might use this old, shipping crate as a table, once I find the chairs.

View of the creek from my deck

Hopefully, I will have a deck reveal to show you soon!  I have also been collecting old lanterns for evening lighting and I found this scrolling, iron, wall sconce at a yard sale for $2.


The finish was green when I bought it, which wasn't bad except for the fact the my house is painted light green too.  


I painted the wall sconce a French gray and then painted a brown glaze overtop.


 I love the scrolling iron and the leaf details of this candle sconce.


It is just a subtle difference, but I like the pale gray so much better.


This post is linked to:


Friday, June 3, 2011

Blue and White Vintage Cabinet


I am always amazed by how cheap furniture is at yard sales.  I saw this plain, little cabinet at an estate sale recently and the woman told me I could have it for $2!  I did not fall in love with it immediately because it was just so plain and boxy, but who could really pass up a two dollar piece of furniture?!  I did love the vintage knobs with the little drops.  Also, the size makes it versatile as a side table or night stand, with the added bonus of being able to store junk inside.


It sat in my living room for a while, as I decided exactly what to do to it to make it a little more...well, less boring.  I finally decided to paint the edges a different color than the rest of it and to add something to the doors.  I was going to stencil a design on them, but at the last minute I decided to keep the cabinet true to its simplistic design and paint on a basic rectangle in the center of each door.  I think it gives the doors a faux raised panel look and adds some interest and sophistication.


After sanding and primering the cabinet, I painted it with an understated blue called rain washed by Behr.  For the white trim I used swiss coffee.


After taking the doors off, I removed all the hardware and applied a few coats of vanilla spray paint.


I used my sewing straight edge to mark where to lay the tape for my lines on the front of the cabinet doors.


I laid the tape just outside the lines and painted the vertical lines and then the horizontal lines or vice versa.


Very easy!


The rain washed blue with white trim worked like magic; it transformed the once dull cabinet into an airy and graceful piece of furniture.


This post is linked to:


LinkWithin

Related Posts with Thumbnails