Showing posts with label lamp shade. Show all posts

Tuesday, December 11, 2012

Linen and Tulle Lampshade


I know it seems like all I do is paint furniture, but there was a time when sewing and lampshade making occupied a lot of my time. You may remember the pair of linen shades I recovered for twin, vintage lamps or this basic lamp shade tutorial I posted on my blog in 2010. Don't forget about these two, linen lamp shades I recovered in 2011. Now, taking you all the way back to my very first blog post with the mini burlap shades I made for a plain little chandelier.  It is nice to take time out from painting and focus on other creative projects.

One of my regular Loot customers brought me a lamp to consign for her.  She also left an old lamp shade and a vintage bridal veil and said I could use the veil to make some kind of shade for the lamp.


I ripped off the old shade covering, exposing the bare, metal frame.  Then, I cut the veil and some pretty, white linen fabric into strips and tied them to the top and bottom of the metal frame.  


This was such an easy way to create a new lampshade!


This shade sold right off the lamp the first weekend I put it for sale at Loot.  Now, I am back to where I started and need to make another shade for this lovely lamp.


This post is linked to the parties on my sidebar.


Monday, June 4, 2012

Verdigris Bird Lamps


My sister-in-law found these unique bird lamps at a thrift store in Pennsylvania and bought them for me for Christmas.  My parents went to visit them at Christmas time and my mom brought them back for me in her suitcase.  I finally got them when I visited my family on my birthday back in February.  I love these lamps!  I finished painting them a while ago, but I had to wait to find the perfect shades.


This is what the pair looked like when I got them.  They are vintage (I am guessing 80s) with a copper finish, which gave me the idea to make them copper verdigris.


They look elegant atop my Louis Blue and Graphite Buffet.


It took me a while to find the right shades for this pair.  I wanted them to be simple because I did not want to detract from the beautiful detailing of the lamps.  I went to Target and brought back shades at least three different times and none of them seemed to be a perfect fit.  Finally, I know this is probably obvious to everyone else, Nancy suggested I take a lamp with me and try the shades on there. Well, I already knew that Target did not have the right shades for me, so I started to look around locally.  On the way home from the farmer's market, I spotted a local family-owned company, Riverside Lighting, whose windows were full of, what seemed like hundreds, of lamps and shades.  I made my way over there the next day and they have an entire room of just lampshades!  Plus, they were 20% off that day and I found the perfect pair of shades!  They are sophisticated, creamy linen with a simple drum shape and I think they look just right in scale and style on the bird lamps.


To create the verdigris look over the copper finish, I mixed Provence and Chateau Gray Chalk Paint.  Then, I dry brushed it over the lamps, letting the copper show through.  For those of you that have not tried Annie Sloan Chalk Paint over metal yet, I can tell you it does an amazing job of adhering.  I did not even wax over top of the paint because I thought the chalky look and feel made the verdigris finish seem authentic.


These beautiful, bird lamps are for sale at Loot.


This post is linked to the parties on my sidebar.


Monday, May 30, 2011

Whitewashed Lamp with Custom Shade


I found this bland lamp at a yard sale for $2.  I am currently on the hunt for lamps because I have so many shades stocked up at home. 


I wanted to whitewash this lamp instead of painting because the finish had such nice texture and I wanted some of that to show through.


 I whitewashed the lamp by thinning some of my white paint with water.  I brushed the mixture on and then wiped it off. I applied a brown glaze after whitewashing and the final color turned out to be a grayish-white.


The owner of Blessings Boutique, Sherry, knows that I like to recover lamp shades and she generously gave me a few of her self-adhesive shades to try.  This was my first time using one of these and it was so much easier than recovering a regular lamp shade.  I didn't even know these existed! I loved how the adhesive held the fabric in place as I wrapped it around the shade.  I still applied a little hot melt glue to the top and bottom edges and then attached a mini-ruffle trim.


Another thing that made this lamp shade easier to recover is that the paper comes off and becomes the pattern for cutting out the fabric.  I usually have to trace the shade onto paper as I roll it along to make my own pattern, like I did here.  The self-adhesive shade saved me sooo much time!  


Here is my finished lamp and shade at the boutique, ready for a new home.


This post is linked to:


Tuesday, March 22, 2011

My Sister's Bedroom Makeover


I just spent two days visiting my younger sister, Emily, and her family in San Diego.  I did not have as long of a visit as I wanted, but I did leave her with a little dresser makeover during my brief stay.

before
Emily received a set of three vintage dressers from her mother-in-law when she got married.  There are two small dressers that she uses as nightstands and one larger one.  She told me that she was ready for new bedroom furniture, as she just got a new bed and wanted updated nightstands/dresser too.  I do not believe in buying furniture new, especially when you have some that is perfectly functional and only in need of a little re-love. 

Her dressers have a lovely shape and I like the scalloped edge along the bottom. The finish was well-worn and outdated, but that was easy to fix. The first morning I was there, we headed to Home Depot and bought some supplies and got right to work!

After

She also had a little lamp with a garage sale lampshade that I wanted to recover. 


I used some vintage bird and floral fabric that Emily got from our older sister, when she cleaned out her massive fabric collection. 


Below are pictures of the finish before and after.

I used a palm sander to even out the surface and remove the old stain before primering.  Then, I painted two coats of pale gray.


When the paint dried, I distressed all the edges, so that the white, base coat and the original wood showed through in places.

We originally wanted to buy crystal knobs for the dressers, but in an effort to save money, we spray painted the existing knobs silver.


I used things that she had around her house to decorate her dresser.  I love the blues, silvers and grays together.  Emily loves birds, so I paired her ceramic bird with the bird fabric on her new lampshade.  She has several of the beautiful, old, blue mason jars with the original lids from garage sales and she got the l-o-v-e letters as a wedding gift.


This is just a start. Emily is going to finish painting the other two dressers herself.  I think it is a huge improvement already and I can't wait to see her room when it is all done!


This post is linked to:


Friday, January 7, 2011

Linen and Ruffle Lamp Shades

I have an obsession with recovering lamp shades and I seem to find them in need of recovering everywhere I look.  I sometimes wish I could pass them up because it is a time consuming project.  I covered this plain, white shade in a pale rose fabric and added a ruffle trim.  This is my favorite lamp shade so far.  I love the gentle scalloped edge on the bottom of the shade with the ruffle trim.  I was going to sell this one at Blessings Boutique, but I love it too much!  


Now I need to find the perfect lamp redo to go with this shade.  Isn't this subtle fabric beautiful with the light shining through it?  


The other lamp shade, I finished yesterday, was a $1 garage sale find and started out bright red.  While it was in perfect condition,  I am just not that into red.


I ripped and cut the red fabric off of the lamp shade frame, while still leaving the liner intact.


I covered the frame in some pretty white linen, covered up the seams and added a raw edged ruffle to the bottom.


I put the shade on a $2 thrift store lamp and moved them both out of my to do pile and into the shop!


This post is linked to:


Sunday, December 5, 2010

Pair of Shabby Lamps

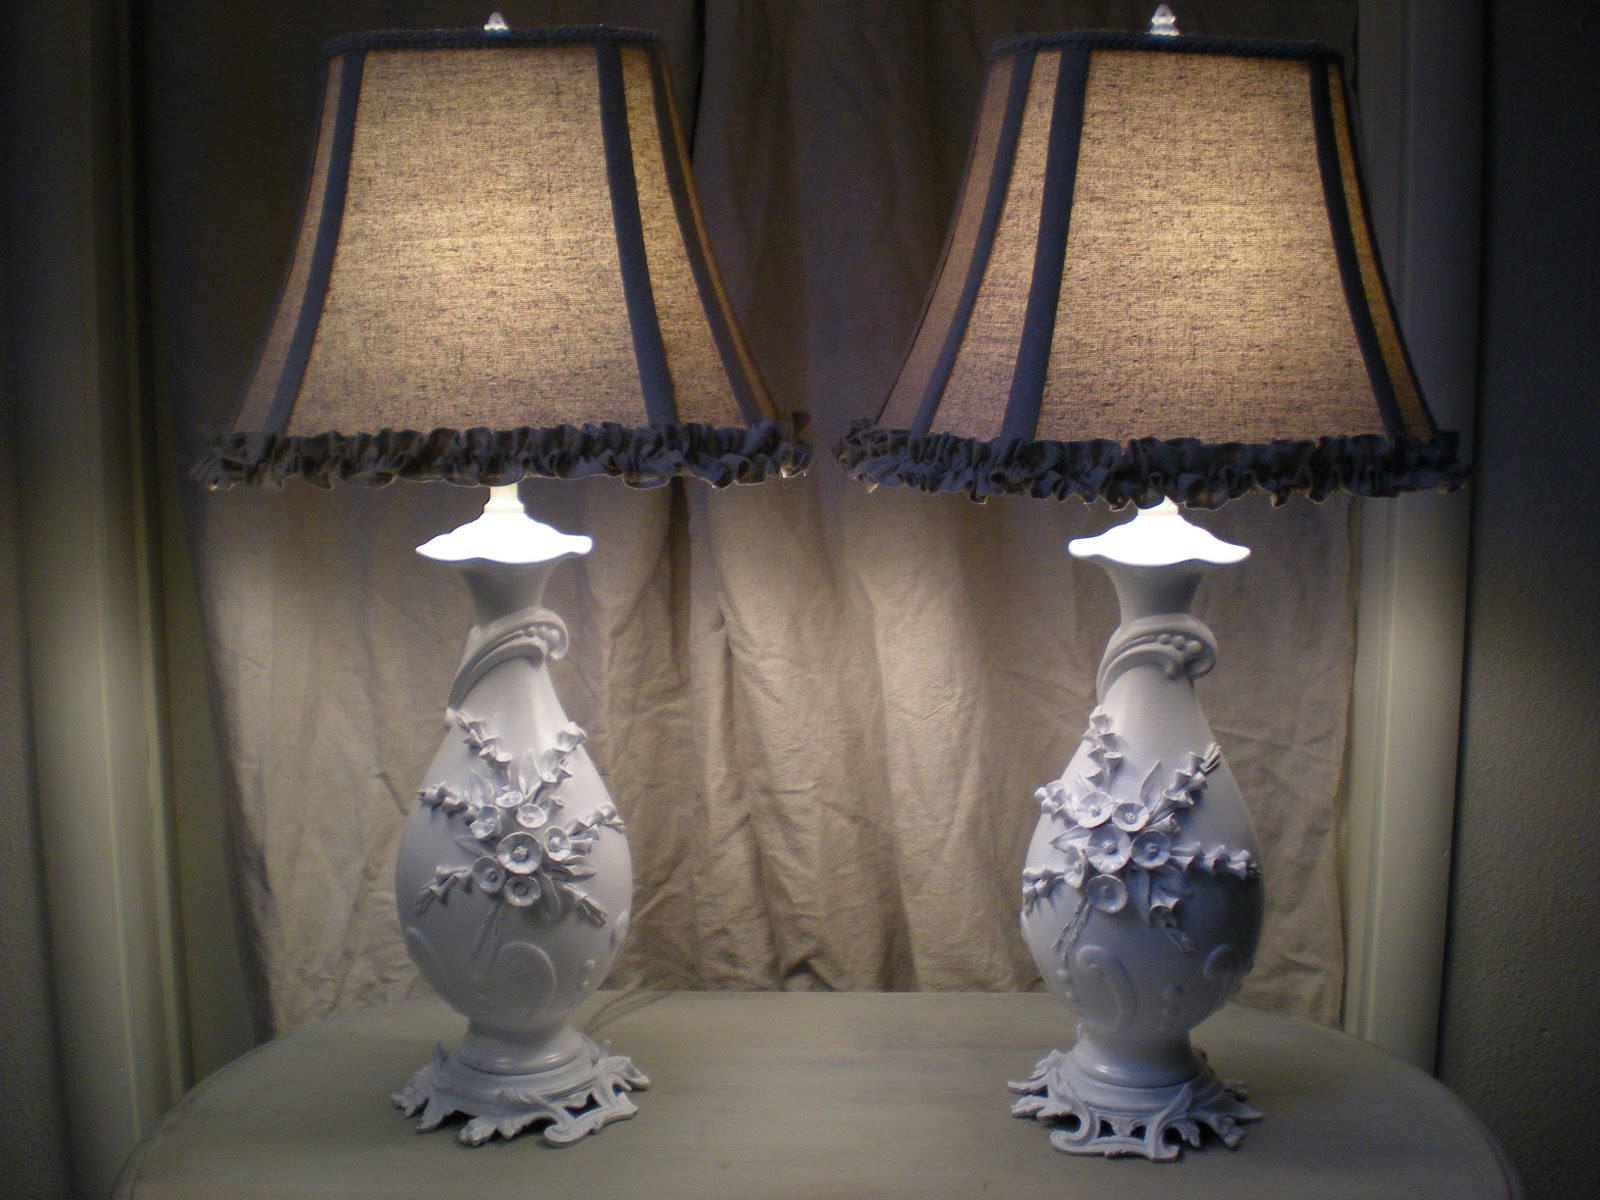
During the summer, my sister, Cindy, gave me this unique pair of  vintage, ceramic lamps that she picked up at DI for $4 each.  She has the best stuff laying around her house and I always get to come home with fun, new projects.  I don't know why I waited so long to start on these lamps, but I knew they would turn out beautifully. 


I had to splurge on the lamp shades because it was hard to find matching shades at yard sales.  I bought these at Ross (the most affordable place for new shades) for $6.99 each. The lamp shades were covered with shiny, kind of outdated, fabric when I bought them.  They would have worked, but were nothing special.  I believe that a beautiful shade makes the lamp and these special lamps definitely deserved better, so I put myself to work.  I recovered them in my faux-linen, flax-colored muslin fabric and added a ruffle along the bottom. 


Next, Mr. Rubbish spray painted the lamp bases and metal stands to match because they were old and dirty looking.  When he took the lamp apart to paint it, he accidentally broke off a small piece of metal inside where the lightbulb goes.  He didn't think it was important until he put it back together and tried to turn it on.  When we plugged it in and turned the switch, it made a bzzzzzzing sound and all of our power went out.  Luckily we didn't get shocked and from now on I think I will always rewire my old lamps first.  Mr. Rubbish is a rewiring expert, so I let him do the work. 


I love the pretty, raised flower design on these lamps.  I wish I had a spot for them in my house, but I am sure they will find a good home.  I brought them to the shop yesterday and everyone was oohing and aahing over them all day. 


This post is linked to:

LinkWithin

Related Posts with Thumbnails