Sunday, October 30, 2011

Grayish-Blue Side Table


This vintage, side table came from a yard sale. I liked the curvy legs and carved detailing, but not the visible knots on the top or the worn, dated finish.


I used the leftover paint from my hutch redo.  It is a mix of Duck Egg Blue Chalk paint and gray to make a very pale blue.  I painted on two coats and then sanded the entire surface with 220 grit sandpaper for a very soft, smooth finish and a bit of distressing on the edges.


I really wanted the table to be a blend of blue and gray, so I mixed up a gray glaze and painted it over the entire table, wiping the excess off, with a clean rag, as I went.  I used a tiny paint brush to paint the scrolling carvings and applique with Pure White Chalk Paint.  I applied one coat of clear wax for protection and a pretty sheen.


This post is linked to the parties on my sidebar.

Thursday, October 20, 2011

Vintage Kitchen Table with Turquoise Legs


I picked up this vintage, round table the same time as the hutch I recently repainted. It is a well-built table and it is a great size for a small kitchen or dining area.


The table was in excellent condition and very sturdy, but the orange finish made it look outdated.


The first thing I did was remove the existing finish from the table top with an electric palm sander.  It took quite a bit of sanding to get through the shiny layer on top, but once I did, the flawless wood underneath was revealed.


I mixed ebony and dark walnut Minwax stains to get a nice, deep chocolate stain for the top.  To protect the top, I applied one coat of satin polyurethane.


I painted the table base and legs turquoise for a pretty contrast with the dark chocolate top.


I used a rag to apply Fiddes & Sons dark wax (rugger brown) mixed with clear wax over the turquoise paint to give it an aged look.


I paired the table with my stenciled slipcover parson chairs.


Here is a shot of the table and the back room of Loot, from this past weekend at our sale.


This post is linked to the parties on my sidebar.

Wednesday, October 19, 2011

Mid-Week Design Inspiration: French Bedrooms

Hi, everyone, I'm Susi and I write as a guest blogger for Design Shuffle, a wonderful platform for designers and design lovers from around the world to share their work and find inspiration. Speaking of inspiration, I'm thrilled to write the Mid-Week Design Inspiration post for Amanda this week. This week's post is all about French bedrooms. Romantic and oh so stylish, French bedrooms are beautiful interior design inspiration for creating a gorgeous bedroom of our own. Here are some of my favorites. Enjoy!

Bedroom Designs

This French bedroom feels like it is straight out of Dangerous Liasons or a fairytale. Beautiful architecture surrounds a bed piled with dusty pastels. Beautiful.

Bedroom Designs

Soft lighting and a canopy gives a romantic, feminine feeling to this bedroom. Love that the pattern is carried from walls to canopy to linens. Tres chic!

Bedroom Designs

Soft French grey is a lovely color for a bedroom. Paired with gold from giltwood furniture or a gilt mirror and pale pastels, grey can create a feminine room.

Bedroom Designs

This Provencal inspired bedroom is centered by a beautiful canopy bed draped in French linens. The bed is from Ikea. Stunned? So were we! Amazing what some paint and creativity can do!

Bedroom Designs

Not all French bedroom designs must be a riot of pattern. This French bedroom is done in a lovely French grey that calm and soothing. Pretty furniture has fantastic details.

Bedroom Designs

Toile is quintessentially French and a perfect fabric for the bedroom. Love the red and white toile on this canopy bed for its bright pattern.

Bedroom Designs

This gorgeous emerald room (photographed by Didier Delmas) is a dark, dramatic French bedroom. What beautiful decorating ideas are found in this sumptuous space! Love the emerald and plum palette.

Bedroom Designs

At first glance, this looks like a settee but is in fact a bed. How whimsical! Love all the beautiful pattern on the bed and wall. Antique oil paintings add a very French feel to the room. Images [ 1 / 2 / 3 / 4 / 5 / 6 / 7 / 8 ]

From romantic bedrooms to modern living rooms, from Boston interior designers to San Francisco interior designers and more! Design Shuffle has so much to offer any interior designer/enthusiasts, come check us out!

Tuesday, October 18, 2011

Two-Toned Hutch Makeover


I finished this hutch the night before our sale, this past weekend.  I waited until the last minute because I was anticipating the arrival of my order of Pure White Chalk Paint in the mail.  I was excited to try the new Chalk Paint color and I thought it would be the perfect color for transforming this farmhouse hutch.  


When I got the hutch it was outdated with an orange finish and gold hardware. Nancy suggested that I take the doors off and I think it was a wonderful idea.  The doors made the piece look heavy and contributed to the outdated look of the hutch.  


I mixed Duck Egg Blue Chalk Paint with gray latex paint to create the subtle, beautiful shade of blue.  The gray paint had green undertones, so the color came out a pretty mix between pale blue and green.  I love the look of the new Pure White paint against the soft, greenish-blue background.


This hutch was a beast to paint because of all the shelves and angles.  I really thought it would never end! 


I replaced the drawer hardware with some simple, metal flower knobs that I took from a dresser I am working on.  I painted the metal knobs with a mixture of 50-50 water and Pure White Chalk Paint.  I kept the existing door pulls on the bottom cabinet doors and gave them a coat of whitewash too.  One of the pulls was broken, so I patched the hole and left it off the middle, faux door.  I originally wanted to replace the hardware, but hardware is just too expensive, so I decided to work with what I already had. 


This post is linked to the parties on my sidebar.

Monday, October 17, 2011

Spooktacular October Sale at Loot Vintage Flea Market


At the last minute Nancy and I headed to the dollar store to make the shop look spooky for our October flea market.  


I love the white pumpkin that Nancy painted with a black crow.


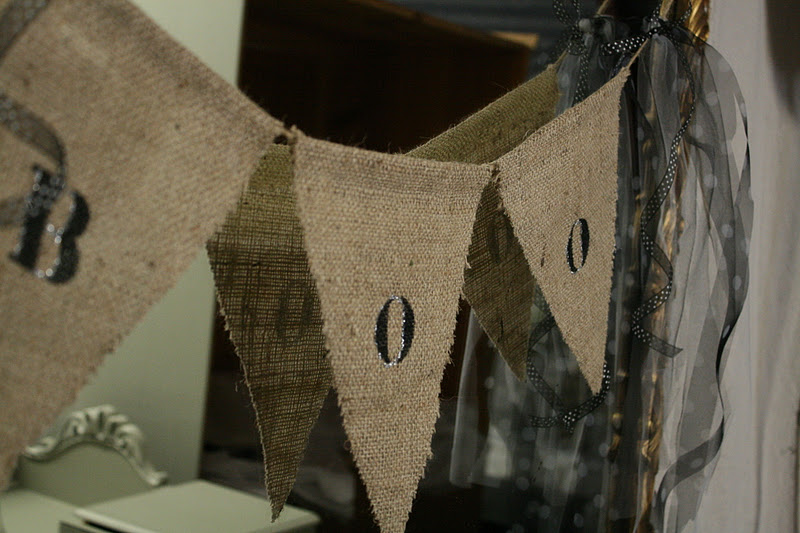
I made a glittered, mini, boo banner for Nancy's fancy clown.


One of our customers rolled up in this beautiful, restored automobile.  It looks so good in front of our vintage shop and I had to get a picture of Nancy posing next to it.


This is what the back of the shop (our workshop) looked like a few days prior to the sale.  Nancy and I make a huge mess while we are working.  Nancy says that this is what happens with creative people.  I think that it is partly because we are both so busy and never have time to clean up.


We pulled the back room together just in time for the sale and made it look presentable.  Our customers never suspected the chaos that took place here before the sale.


Nancy hollowed out this giant pumpkin and filled it with a beautiful, fall flower arrangement.


We had new, talented vendors join us in the garden with all of their lovely vintage and repurposed items.


Nancy found this great wooden rosary and tall cloche at a pre-sale we attended at her friend's barn on Friday.


During our September sale, a man stopped by the shop and asked if we wanted to buy his trunk.  We love the weathered wood and the rusty hardware, so we took it.  It is now for sale at Loot and I think it will be the perfect coffee table.


I made some velvet pumpkins for the holidays and sold several of them during the sale.  I have one left in my etsy shop. I went across the street from my house to my friend's farm and she helped me dig through all of her butternut squash vines to find the left over stems.  I love them because they still have the delicate, little tendrils attached.


I also made some linen pumpkins with pretty ribbons and old copper wire.  The stem is from a dried sunflower stalk, also from Casalegno Family Farm.  This linen pumpkin is for sale in my etsy shop.


This post is linked to the parties in my sidebar.

Monday, October 10, 2011

Halloween "Boo" Banner and Stencil Giveaway Winner

I am happy to announce the winner of my stencil giveaway tonight!  

I used the random number generator...

...and the winner is:  lucky #7 from Ruffles and Relics.  Congratulations!

Thank you, Maison de Stencils for offering this giveaway and to everyone that entered.  I wish you all could have won!


Nancy and I have started having craft night once a week to make items for the shop.  Last week we made some "Boo" banners for our October sale this coming weekend.  

Our sale is October 15th-16th at 3011 Main St. in downtown Soquel.  We are working on getting the whole shop decked out for Halloween.  I am looking forward to showing you all the pictures after this weekend!  If you live in the area, stop in for a "spell".


We cut the banner out of burlap and used my vintage brass stencils for the lettering.


We decorated the sides of the banner with strips of black and white tulle mixed with polka-dot, ribbons.


I am saving most of them for the shop, but I am going to put this boo-tiful banner in my etsy shop!


This post is linked to the parties on my sidebar.

Friday, October 7, 2011

Paris Script Bench


I love to redo benches and I was happy to find this vintage one at the Santa Cruz Flea Market a few weeks ago.  


The old finish was scuffed up and, as you can see, the seat cushion was pretty disgusting.  The man I bought it from told me that the night before he had a dream that his old bench had become beautiful.  Well, I suppose his dream was about to come true.


I removed the old fabric and cushion first and then painted the bench.  I painted it with a gorgeous grayish-brown color that Nancy made by combining paints.


I bought new foam for the seat and I used some leftover Paris Script fabric, from another bench I fixed up, to recover the cushion.  


I wish the man from the flea market could see his old, ugly bench now.


This post is linked to the amazing parties on my sidebar.

LinkWithin

Related Posts with Thumbnails