Showing posts with label picture frames. Show all posts

Tuesday, September 27, 2011

Vintage Chair and Frame Chalk Paint Transformations


I bought this cute, vintage chair and ornate frame from an estate sale recently.  


The chair had a very dark stain and the seat was upholstered in black leather.  It looked like it had never been used. Although it was in perfect condition, it still needed an updated look.


I chose the Duck Egg Blue chalk paint for a complete transformation.  I love the little cutouts on the back of this chair and the shape of the legs.  The Duck Egg Blue really brings out this chair's best features!


I went to the local fabric store and I could not find any fabric I liked with the Duck Egg Blue.  I wanted the chair to be the focus, so I didn't want anything too bold or busy.  Nancy suggested that I just use burlap.  I was not sure at first, but after I got the whole chair put together I was convinced that was the right fabric choice and the chair sold the first day of our sale.


 I love large oval frames and this one has beautiful detailing.  It has chips and hairline cracks, but I think it adds to the chippy charm.
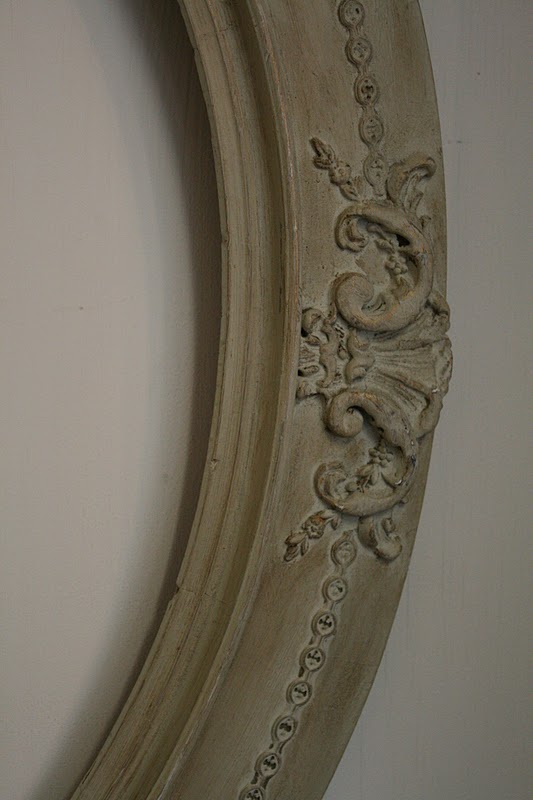

I painted it in Country Gray Chalk Paint with dark and clear waxes.  I sanded it to allow some of the gold to show through.


This large, ornate frame would be perfect as a chalkboard, but it also looks great as it is. 

This frame is for sale in my etsy shop!


This post is linked to the fabulous parties in my sidebar.

Tuesday, May 10, 2011

Tutorial Tuesday: Fabric Covered Bulletin Board


I have a lot of vintage frames, from yard sales, and many of them do not have any glass or backing.  I already made chalkboards with some of them and this time I decided to try a bulletin board covered with fabric.  


I found an old bulletin board at a yard sale this past weekend for $1, that was the big enough for one of my large, vintage frames.  Mr. Rubbish took it out of the frame and trimmed the board down with his jigsaw to fit my vintage frame perfectly.  I know you can buy cork board in rolls at craft stores, but I prefer to buy used, when I can. 


To cover the cork board with fabric, just pull it over the board tightly and staple it to the back with a basic staple gun.  So easy!  

Do you remember the Paris map fabric that I used to reupholster this bench?  I originally bought this fabric to recover a chair for my Parisian friend, Jenni.  The chair frame got warped and I could not fix it, so I made her this bulletin board instead.  

I painted the frame black and distressed the edges before putting the fabric-covered cork board inside.  

You can glue or nail the bulletin board to the frame.  I just took mine to a frame shop and had them attach it for me.  It took them about two minutes and it only cost me a few dollars.


This post is linked to:


Monday, April 18, 2011

Chalkboards in Vintage Frames


I had several vintage frames laying around and I decided to make a few chalkboards to go inside them.  I bought some sheets of thin, smooth wood from Home Depot and Mr. Rubbish cut them down to the sizes that fit my frames.  I primed the wood and then painted four coats of chalkboard paint over it, sanding with fine grit sandpaper in between coats.

This vintage frame used to house a wild turkey print. It was dark and outdated, but I liked the distressed wood.


I painted the frame white and sanded the edges before attaching the chalkboard with wood glue.


I love the fancy, scrolling details of this Syrocco style, vintage frame.  


The frame was originally gold and black and had an old print with red, velvet trim. I removed the velvet border before making it into a chalkboard. This frame did not come with glass, so it was a perfect choice for a chalkboard.


I painted the frame a pretty shade of aqua, glazed it and applied gold Rub 'n Buff over all the edges and raised details.  


I painted the two small, vintage frames aqua and took them to the shop yesterday to help me advertise the sale in my booth.


Chalkboards are an ideal project for empty vintage frames, especially the ones that do not have glass.


This post is linked to:


Tuesday, February 22, 2011

Tutorial Tuesday: Botanical Art


It seems to be ages since I posted a tutorial, but this project is perfect because it is free (if you already have frames laying around) and easy!

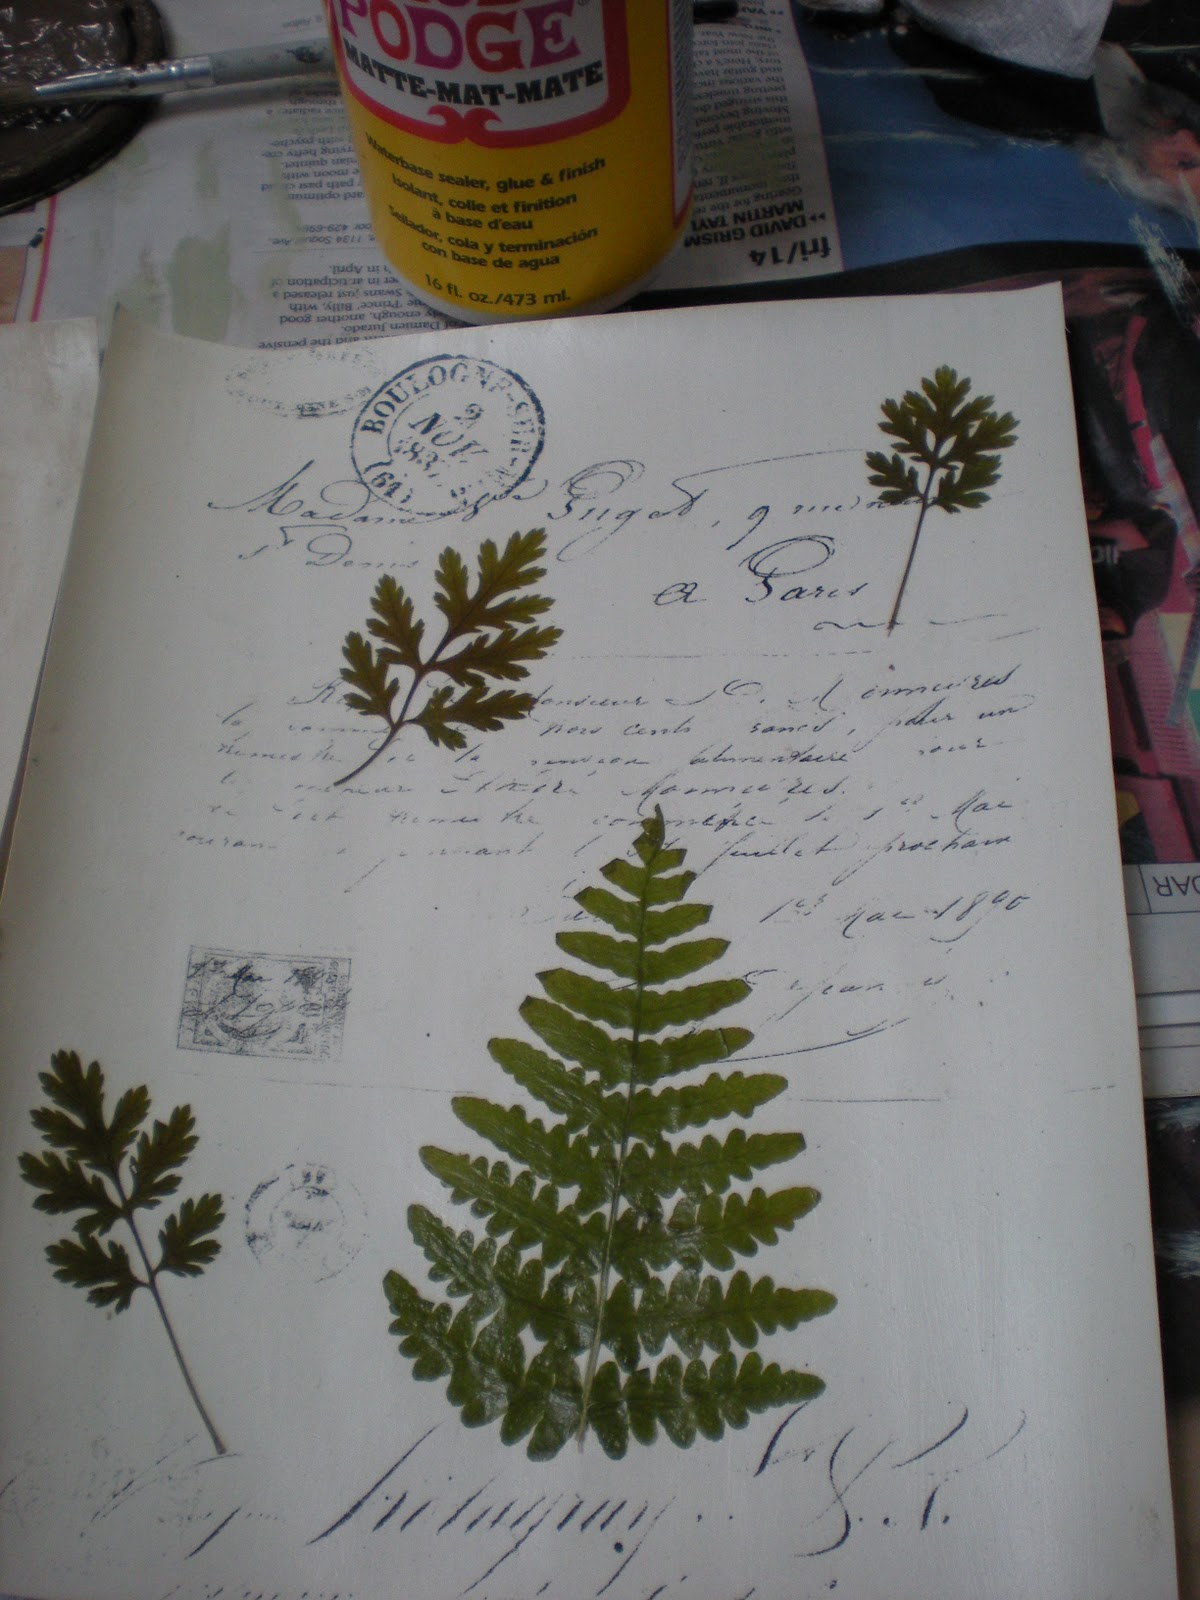
At the end of summer, my sister and three nieces and one nephew came for a visit.  I live in a magical forest and we went on a nature hike, collecting leaves, flowers, and ferns.  When we got back to my cabin, we pressed them between sheets of wax paper inside thick books.  There they stayed, nicely preserved, until I decided to use them for this project yesterday.


First, I printed several vintage, fancy script, postcards from the Graphics Fairy onto a creamy cardstock.  Then, I used Modge Podge to adhere the leaves to the paper.  I also painted a layer of Modge Podge over the entire surface to protect the delicate leaves.


I wanted the paper to look aged, so I used a glaze to give it a nice, old patina.  I just brushed it on in a circular motion and rubbed it off with a paper towel.


These two 8x10" frames were $1.50 each at a thrift shop and I have had them sitting in a box of frames that I primered, but never painted.  They started out a pewter color.


I looked through my craft paint and, appropriately, selected a color called moss green to paint the frames.    I rubbed on some glaze after I painted them to give them an aged patina too.


For the finishing touch I added antique gold rub 'n buff along all the edges of the frames.


That is all it took to create some beautiful and unique, botanical wall art!  You can do this easy project using whatever leaves and flowers grow outside your house.


I had so much fun making these and it brought back fond memories of this summer and our nature hike through the magical forest.


This post is linked to:


Friday, October 1, 2010

Oil Painting Meets Vintage Frame

My talented brother-in-law painted this amazing tree picture and gave it to us for Christmas a couple of years back. I knew that I could not get just any old frame for this painting and so the quest began...


I went to Michael's first because I had a coupon for 60% off custom framing and thought that meant it would be really cheap. Um.... not quite. In fact, the frame I chose was $160 for an 11 x 14 and that was after the 60% discount! I guess I was clueless about the cost of quality frames and so, the search continued...

I found another beautiful frame at an antique store made of solid wood with a strip of ornate, decorative metal. It was only $50, but the dimensions were a little bit off. Every frame that I came across was either too small or way too expensive. Until...

Finally, I found THE ONE and it only took me a couple of years! I picked up this beautiful, old picture frame at an estate sale for $10. I tried to negotiate, but the woman selling it just gave me a cold stare and asked, in disbelief, "Do you know how much this frame is worth?!!" While, normally, I ignore those comments from sellers, in this case, I got the feeling that she was right (and I loved the frame) so, I told her I would take it.


I love the softly gilted gold and the ornate detailing of the frame combined with the brown and gold tones in the tree painting. It was a perfect match! I was not sure what kind of frame I wanted, but this one is better than any of the frames I had been envisioning. Searching for the precise picture frame was not easy, but it was worth it in the end! I found a frame worthy of this artisitc masterpiece.


Now...
Mr. Rubbish (the resident picture hanger) needs to get around to hanging it in the living room for me. I can't wait!

Friday, September 24, 2010

Vintage Picture Frame Makeovers

A constant, that always seems to show up for me, at yard sales, are vintage picture frames. I love taking them home, fixing them up and giving them a fresh start in life!

I found these two vintage frames with floral appliques in the corners. They were stained a dark brown and I knew they would be better white and a little shabby.

Before


After


This chunky vintage frame is one of my favorites. It started out brown and had a dated, linen border toward the center. I primered the whole thing, including the linen border and then painted it with flat black paint. I left the thin gold trim on the inside.

Before


After


I found these two large frames at a rummage sale for $1 each. The largest one was light colored with a linen border. The other one was dark brown with ornate corners that did not stand out with the dark brown stain. I primered them and painted the largest frame flat black and the other one white.

Before


After


I did not get a before picture of the next two vintage picture frames (darn it!). I wanted to include them anyway because I painted them the same creamy white, but I also used Ralph Lauren's glaze in smoke color over the white to give them a more aged look. The smaller frame is actually plastic (orange before painting) with a metal border on the inside. The larger one, with the wooden appliques, was stained a dark brown when I found it.


This post is linked to Frugal Friday at The Shabby Nest.

LinkWithin

Related Posts with Thumbnails